Wednesday, September 24, 2014

Dream Big Little One Pillow


We'll soon be moving, and when we do our 2-year-old will finally get to graduate to a big boy bed! He doesn't complain, but I figure he's getting cramped in his mini-crib :) 


I've been really excited planning his room decor, and especially this important transition for him. Maybe that's what inspired my new Children's Room Decor Pillow Case line! My favorite is this pillow case, which encourages children to Dream Big! I love that the colors match any boy or girl bedroom motif, and display such a positive message.


I made a few and they are so beautiful, and I couldn't resist getting my little guy's reaction. 


I think he likes it!

Sweet Dreams!

Monday, September 15, 2014

Long Distance Relationship Pillow Cases

One of my favorite things about the Pillow Case business is that the item inherently brings people together. The images and words promote a loving relationship, and I like to think couple's enjoy some good "pillow talk" because of them :)

My pillow case sets are usually bought for couples and as wedding or anniversary gifts, but sometimes an order is placed for a couple in a long distance relationship. I love that!

Last week an order was placed by a girlfriend requesting that one side be sent to her and one side be sent to her boyfriend serving overseas in the military so that they could share this intimate pair.

Isn't that sweet?

Especially considering that the set she chose to bring them together was our Kissing Swan's Pillow Case Set :)

So even if they can't kiss is real life, their pillow cases can!


Sweet dreams!

Friday, December 6, 2013

The Road to Nashville: My First Celebrity Gifting Suite

In September I got an unusual e-mail from a Los Angeles- based PR company, Celebrity Connected, inviting me to "sponsor" and participate in a gifting suite for the George Jones Tribute Concert in Nashville, TN. Sponsoring meant that for a small fee I could have a 10x10 space to display my pillowcases, meet the celebrities in attendance to the event, give out pillowcases, and take as many photos/videos of the celebrities talking with me and interacting with my products as I wanted to use for future marketing. The potential payoff for this type of exposure is huge, but I knew it would require lots of work and some money so the decision wasn't easy. At first it sounded like a too-good-to-be-true Nigerian-type of scam, so I spent a week emailing questions to Celebrity Connected and even talked to three different business owners who had been involved in their gifting suites in the past for references. (I am so glad I took the time to do that- people with experience gave me so much helpful advice about how to attract the best attention and make the most of the experience!) Ultimately I decided to take the risk (or I wouldn't be writing this post.)

 As one business owner I talked to advised me, "With an opportunity like this you need to make an impression. Go big or go home." So in 8 weeks Ben and I created a new website (so I could use this as an opportunity to veer away from Etsy), I had decals for 3 different pillowcase sets mass produced (vastly cutting down my production time but with enough involvement that they are still considered handmade), my sister-in-law redesigned my logo which I used to create new business cards, t-shirts, and two step-and-repeat style banners, I made and packaged around 150 samples pillow case sets to give out, we made a 5-hour trip to Ikea plus many smaller shopping trips to other stores to procure essentials for my faux bedroom display, practiced setting up the faux bedroom 3 times, enlisted the help of my two sisters and a local photographer to photograph the event and help with set up and childcare, and lots of other minute preparation that our lives and my mind basically revolved around until November 23.

In the midst of our anxiety, excitement, and preparation for Nashville what I call "The Perfect Storm" hit. In a good way. Sort of. Firstly my pillow case supplier called to inform me that the pillowcase style I've been ordering once a week for months was being discontinued. They only had a few cases left. I have a great relationship with this small company, so they called so I could reserve the cases. This was a huge blow. After two years of using various pillow cases the ones I order from them are perfect. They are the perfect size and the quality is so great that they are compared to 1200 thread count sheets! This meant I'd need to find a replacement pillow case until they started carrying the same style again in January. Great. Not only did I need 150 extra pillow case sets to give away in Nashville, but it was the beginning of the Christmas shopping season and I was already getting twice the orders I was getting at the same time last year.

Having a lag in pillowcases meant I had a (unexpected and unrequested) break from work, so Whit and I joined Ben on a business trip to one of our favorite places- the quaint mountain town of Blowing Rock, N.C. I was grateful to have the literal and figurative breath of fresh air, until I started getting buzz after buzz of Etsy notifications of sales around 10:00 one night. I then got a buzz that my shop had been mentioned on Twitter, and mentioned to Ben how weird that was. Being the technologically-savvy MBA student and business co-manager that he is he immediately checked the Google analytics for my Etsy store and we discovered that Ali Fedotowsky, former The Bachelor contestant, Bachelorette, and current E! News correspondent, had been given a set of my pillow cases and tweeted a picture of she and her boyfriend holding them. The photo got 12,00+ likes on Twitter and Instagram and resulted in around 50 sales for me in the next 12 hours! I was literally shaking (quietly, since Whit was asleep in his port-a-crib a few feet away) from the exposure, but Ben kept calm and started our own social network campaign. My sales continued to rise dramatically after that, and, with no pillow cases to use to even make these orders I was left a bumbling puddle of nerves!


It took around 2 valuable weeks to settle on a lower quality pillow case replacement, but at least that gave me the opportunity to work on the other aspects of our Nashville display, and the Ali tweet gave me the confidence that I needed to move forward with such a risky endeavor. I mean, obviously people (and fashionable, important people) loved my product!

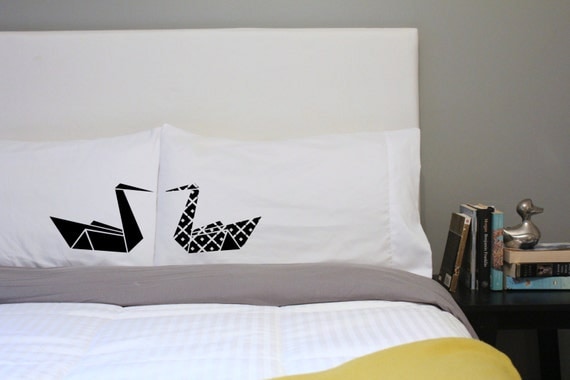
150 Pillowcases in 4 different designs

When we actually got the car packed and we started our 8-hour drive the morning of November 20 I was actually feeling pretty good. I don't know how I did it, but we'd actually pulled it off- a beautiful and interactive display, all of the samples I could need, the perfect marketing materials, and extra hands to help. I had done my research and was as prepared as possible. So naturally I got a call after arriving on Wednesday that the gifting event had been altered from 6 hours on Thursday to 10 hours both Thursday and Friday! This was supposed to be a good thing- it meant that the concert was a part of history and, as such, had attracted more attention from eager musicians than expected and the concert managers were constantly changing the schedule to accommodate the growing number of celebrities involved. Well, I wasn't prepared for that, but had to put on the professional attitude I'd been getting used to and figure it out.

Our smaller display for the Thursday gifting suite

I did enjoy the backstage experience, the freedom to wander during rehearsals and sound checks, and feeling special,  but I have to admit that I was exhausted and irritable during the event. Luckily my family understood the pressure I felt and all pitched in to help. My sisters swapped watching Whit in our rental home and being with me at the event, and Ben followed all of my instructions with patience and understanding, even when I forgot to say "Thank you."  I am so grateful for the eternal love and bond of families! We did have a lot of fun, and my tongue was actually blistered from talking while smiling for so many hours on end! Our display was so impressive, our group was so fun, and our product so wonderful that the Celebrity Connected organizers even gave us the prime location for the main giveaway day, Friday- right beside the door! We were the first stop for celebrities coming in, and sometimes the only stop they made after realizing they were too hungry to stay for the full gifting suite.

Setting up on Friday with some old pro, Kate Mesta's Kate and Sondra

Whit came to visit for a little while!

The attention the pillowcases received was incredible. Person after person acted polite when shown my booth then exclaimed in surprise as soon as they actually felt the quality of the pillow cases and were shown the different designs I had. A few brought their friends or family straight back to my (and only my) booth to plead with me for extra samples, and even the security guard stationed at the door asked for a sample when it was all over because he had heard so many people talking about them outside!

 Ken Mellons 

Charlie Daniels

Rodney Adkins

John Michael Montgomery

Montgomery Gentry

I got some amazing photos of people pretending to sleep on the bed cuddled with my pillow cases or happily holding one out, a few musicians immediately tweeted or wrote to my shop on Facebook, and I exchanged tons of business cards, but the most valuable part of the experience for me was the confident that only experience can bring. I worked longer hours than I ever have, received more orders than I ever have, had more strikes of creativity than I could remember, and managed business calls with the calm professionalism I'd always admired from the big screen all during Whit's nap times. I can truly say my product is "Celebrity endorsed" because it was fawned over sincerely by so many people. In short, no matter how it all turns out I am so proud of myself for accomplishing more than I ever thought I could and for providing a product that is truly top-notch.


If you are curious about participating in a gifting suite or sponsoring an event with Celebrity Connected or another celebrity PR firm please leave a comment with your email address so we can talk. I learned a lot of valuable things and would highly recommend you don't go into that experience blind! 

Wednesday, February 6, 2013

Sharon's Tea Party Baby Shower!


A good friend from church, Sharon, is expecting their first child- a girl- in two short weeks! We are friends, I am her Visiting Teacher and her husband is our Home Teacher, so we get together often and it was a complete no-brainer to throw her a shower. I am so in love with pregnancy and was so excited to celebrate my son at my own baby shower, so I was really excited to throw her the shower and celebration she deserves! She and I agreed on a tea party, the antique-y type and not the Mad Hatter type, as a theme for her shower and boy did I take off with it!

I used my own china set for an authentic feel, white, glass, and silver plating, fresh white flowers, and candles for decoration. I also used my own taupe tablecloth to add some warmth. I love using real fabric! 

It was the first time I've ever used my china! Yay!


I used a combination of silver, milkglass, and white to decorate the refreshments. The little tea spoons in this picture came from Harris Teeter. I love them! The silver serving trays were from the $1 store, and I used my own white and taupe blankets and tablecloths to add some warmth to the tables. 

Tea parties must have tea sandwiches! I had a great time researching typical tea party food and used these three recipes: 


And my signiture desert, French Meringues! I made them in shades of blue to add some variety and match the blue flowers of my china set. 

the cucumber sandwiches were actually cut using a tea cup cookie cutter. There's no picture, but they looked darn cute! I love a good theme :) 


 I added a garland around the room of alternating white doilies and tulle circles (packs of both found at the $1 store) on twine. The white, tulle, and brown twine were perfect colors and sweetness!

A string of white twinkle lights around the room was another perfect touch. 


One activity was for each guest to write a note to Sharon and the baby on a matted picture of Sharon and "My hopes for you" card. The cards can go in the baby's scrapbook for later, and the picture doubles as a keepsake nursery decoration! This was a great baby shower activity to fill any gaps of time. 


One of my favorite moments of the party was a spontaneous one (and after all of that planning...). Lots of Sharon's extended family attended from around the state so there was a mix of people who had never met. I gathered everyone to the living room in preparation for the game but asked everyone to introduce themselves and say how they know Sharon before we started. Each woman said something special about Sharon and her family, and I learned of the many ways they have touched other's lives with kindness and service, and how much everyone loves them and is looking forward to their baby. That few minutes of dedicated "This is why we love Sharon and are so excited for Annelie" time is pretty much the point of every baby shower, isn't it? 


The active, group game was "Pin the Baby on the Belly"! I downloaded and printed a black and white cartoon baby image for each guest and had a maternity picture of Sharon's blown up to poster size at Office Depot for this game. The picture was a silhouette of her torso, which was perfect, and the print was only $3 because it was black and white! This game got everyone out of their chairs and laughing, perfect since many of the party guests didn't know each other. 


 And what's a baby shower without a special seat for the mother-to-be to open all of her new goodies? 


Sharon with her mother-in-law, Ann, and her mom, Lee. (Her daughter, Annelie, is named after them both!)


My 6-month-old attended, and he missed two naps while I set-up, had the party, and cleaned up. So I spent  a large chunk of the morning like this: 

Thanks to a lot of organization, early preparation, and great friends it went really well, though! A *HUGE* thank you to Rachel for hosting the shower and helping with all of the set-up, Mary and Patti for some last-minute decorating, Christina for taking pictures, Hayley for helping with blindfolding, and Aimee for holding Whit. 

It takes a village, people! 

But I hope Sharon enjoyed her Tea Party Baby Shower as much as I enjoyed preparing it :)


Thursday, August 30, 2012

Charleston Benne Wafers Cookie Recipe


The other day a photo surfaced of kayakers riding through Market St. in Charleston, South Carolina, after Hurricane Isaac left over 1 foot of water in the streets. The day before my husband told me he felt like going kayaking, but it wouldn't have been very convenient. I sent him the picture the next day and said, "If only we lived in Charleston you could have kayaked yesterday!" We used to live in South Carolina and have visited Charleston together a few times, so his response to seeing the flooding was, "I hope they saved the Benne Wafers and Sweet Grass baskets!"

Let's just say I read between the lines to find any opportunity to make/ do something for him (even though he doesn't usually realize it's what he'd wanted without me pointing it out to him afterward), so let's just say I immediately scoured the internet for Benne Wafer recipes.

We may not be able to kayak down Market Street, but at least I could bring the taste of Charleston home!


Charleston Benne Wafers Cookies Recipe:

Ingredients: 
  • 1 cup sesame seeds (affectionately known as benne seeds, giving these cookies their name. I used 1/3 black sesame seeds, found in an Asian food market, for color.)
  • 3/4 cup butter, melted
  • 1.5 cups packed brown sugar
  • 1 tsp. vanilla extract
  • 1 egg
  • 1 cup all-purpose flour
  • 1/4 tsp. salt
  • 1/4 tsp. baking powder
Directions:
  1. Preheat oven to 375. 
  2. Spread sesame seeds on an ungreased pan and bake for 6-8 minutes, until light brown. (Don't skip this step! This draws out a terrific, nutty flavor that is essential to the cookies.)
  3. Mix all ingredients together until combined. 
  4. Drop 1 tsp. 1.5 inches apart on a greased baking pan. 
  5. Bake for 4-6 minutes, until lightly brown. 
  6. Let stand on pan for an additional 2 minutes, then remove and cool completely on a cooling rack. 
  7. Enjoy your authentic southern treat! 

I was delighted that this is one of those recipes that seems exotic but is very, very fast, easy, and uses all ingredients I had on hand. I made this batch of cookies in about 30 minutes before my hubby came home from work! They were pretty sticky and I did have to watch them closely so they didn't over-bake, but he was pretty excited to have Charleston Benne Wafers as a surprise when he came! They turned out to be a little thicker and chewier than the authentic Benne Wafers, but my husband said he likes them a lot better that way! 


When he came home and tried one he said, "Wow... they are like Benne Wafers, only better." Isn't he the best? 

If you've ever visited Charleston or heard of these authentic southern cookies you know you need to march into your kitchen and whip these together ASAP. If you haven't been, tasted, or heard of these cookies you still should march into your kitchen and make these cookies ASAP. 


Monday, August 20, 2012

Topsy Turvy Cake w/ Best Pound Cake Recipe EVER!


Shortly before my ADORABLE baby boy was born I decided I needed to hone my baking skills. In the words of Monica from Friends, "I want to be the mom with the best chocolate chip cookies." In my case that didn't mean Nestle Tollhouse (10 points if you understand that reference!), but making cupcakes, cakes, and cookies and different frostings and decorating techniques from scratch. I have to say of all my craft hobbies, this one is the most DE-LICIOUS!

My most recent endeavor was a Topsy Turvy cake for my son's baby blessing celebration. It was only a small-scale luncheon with some family, but I'll take any excuse for a cake! I have been curious about Topsy Turvy cakes for a long time, and literally woke up multiple days planning the one I would make for him. I'm happy to say it was easier than I thought!


Carving the cake into the classic shape was pretty easy 
after crumb coating 3 layers of pound cake and sticking it in the fridge to cool. 

I cut out some parchment paper in the shape of the bottom of the top layer, and my husband 
jumped right in to volunteer cutting out that circle from the middle of the bottom layer. 
He then jumped in to eat the part he'd cut out :)

I would suggest making the topsy turvy shape even more prominent than I did. It seemed pretty drastically planed, but, after seeing it decorated, I would have made an even sharper angle at the top and carved in more toward the bottom. But you live and learn, right?


I tried making fondant for the second time for this cake, but it was HORRIBLE! I just can't 
figure it out. Any advice out there? But Buttercream Frosting 
tasted great and looked good, too, since I'm pretty comfortable frosting!


I printed out his name in a fun font, then taped some parchment paper over the print out to use as a stencil. I used thick Royal Frosting to pipe the letters of his name, let it sit for a few hours, then used more of the same frosting to help the now-stiff letter stand up on the cake. 

 I looked up tons of pictures of topsy turvy cakes, but couldn't find any I wanted to replicate for this simple, yet festive, occasion. I decided on sprinkles on my own to accentuate the planes of the two layers. The cake had been in the fridge, so I wet a paper towel and added the areas I wanted to cover so they would stick the hardened frosting. I LOVE how fun it turned out!

The final product!


Pound cake is recommended for tiered cakes that will be carved. It is durable and delicious- the perfect cake for the shaped Topsy Turvy Cake! I looked up many pound cake recipes, and used two variations of this one. It was AMAZING and I'll never use another recipe!

The Best Pound Cake Recipe Ever

INGREDIENTS
3 sticks (1.5 cups) Butter
1 bar (8 oz) Cream Cheese
3 cups White Sugar
6 Eggs
1 tsp. Vanilla Extract
3 cups All-Purpose Flour
1 tsp. Salt

DIRECTIONS
1. Preheat the oven to 350 degrees F. Grease and line three 8″ round pans.
2. Cream butter and cream cheese together until smooth.
3. Add sugar until light and fluffy (about 5 mins)
4. Add eggs one at a time to creamed mixture, beating well until combined. Mix in vanilla.
5. Combine the flour and salt and sift together. With the mixer on low speed, add the dry ingredients to the creamed mixture in two additions, mixing until just combined.
6. Pour into the prepared tins and bake until golden and tester comes out almost clean (just a few crumbs attached). This will take about an hour or more.

Chocolate Cream Cheese Pound Cake:
Follow all ingredients and directions above, but substitute 3/4 cups of flour with 3/4 cups of cocoa powder. I also substituted hazelnut flavoring for the vanilla, but vanilla would still be great!